Past Design Teams

Showing posts with label Red Rubber Designs. Show all posts

Thursday, January 08, 2015

Red Rubber Inspirational #202 - Color Combination


It's my turn again on the Red Rubber Inspirationals blog this week and my theme is to use the color combination pink/brown/cream on your project.  You must have a stamped image on your project and use the color combination.

For my projects this inspirational I used the Asian butterfly stamp set; stamping it in brown stazon ink onto sheets of music paper.  I colored the image using pink Copic markers.  I stamped the sentiment onto cream cardstock using the same brown ink.  I trimmed the image and sentiment with deckle scissors and added it to the card base.  I added glossy accents to the butterfly.


for the remaining four cards, I followed the same steps.  I used German glitter glue to outline the butterflies; instead of the glossy accents, so they are super sparkly.


here is a closeup of the glitter...


I hope you'll pull out your stamps and play along with me this week!!  Be sure to link up your project before January 14 at 11:59PM.

Happy crafting....Lynda

Entering this card into the following:


Thursday, December 11, 2014

Stamped Sparkly Holiday Greeting

Time for a new Red Rubber Inspirational challenge and this week I am the host.

My challenge for you is to pull out your holiday stamps and create something sparkly....

For my projects I decided to use the same image twice; the wonderful poinsettia from the Holly Season stamp set.  For the first card I stamped it in versamark ink and then used a black glitter embossing powder to emboss the image.  I then colored the image with my Copic markers.  I then trimmed the image and added it to a block of glittered black cardstock; which was then placed in the center of the card base.  The sentiment from the Vintage Christmas set was then stamped onto the bottom of the card.  I then added the black dots around the edge of my card and went back to the main image with a white acrylic pen to accent the flower.


here is a closeup so you can see the glitter embossing:


For the second card I used flat black embossing powder and decided to use red glitter paper and a different sentiment.  


I hope you'll have time to stamp up a sparkly holiday greeting and join my challenge for you.  You can link up your projects to the Red Rubber Inspirationals blog post here...you have until Wednesday, December 17 to link up!

Happy crafting....Lynda


Thursday, November 13, 2014

Let's get stitching...

It's my turn on the Red Rubber Inspirationals blog this week and my challenge them is Stitch Me Up.

For this challenge you can create any project you want as long as the focus is a stamped image and there must be some stitching on the project as well.  Stitching can be either real or faux.

For my project I started by first stamping the wreath image from the Holiday Wreath set in green ink.  I then stamped the sentiment from the Pine Wreath set on white cardstock and trimmed it close.  I then mounted both images onto red cardstock.  I added the images to my card base and drew on my stitching lines.  I then added sequins and red stickles to the wreath to give it a more festive look.


I hope you'll pull out your stamps and join me this week!!!  You never know...you could be one of our next Inspirationals on the Red Rubber Inspirational blog!!

Happy crafting....Lynda

Entering this card into the following:


Thursday, October 23, 2014

Come stamp with me....Focus on Stamping Anything Goes challenge at Red Rubber Inspirationals

I'm up again this week on the Red Rubber Inspirationals blog with another round of Focus on Stamping Anything Goes.  So be sure to pull out your stamps and join in the fun.  As long as the focus of your project is stamps.....you can submit anything.  Please be sure to put in your writeup what the stamping images you are using are.

For my project this week I decided to get started on my holiday cards...(I know for those of you that know me...this may come as a shock and you may think someone else is posting on my blog, but no...it's true...)

I started out stamping the Let It Snow image onto white cardstock.


I then used colored the image lightly with the smallest number of pink, purple, and blue copics in my collection.  I also added some grey and blue to the snow areas.  I then added versamark ink along the edges of the stamped image and embossed silver along it.  I used the same silver on the edge of the black cardstock I matted the stamped image with.  I added the small white dots to the cardstock to look like snowflakes.  I then mounted the stack onto my white card base.  I finished the card with some clear Wink of Stella along the snowflakes and snowdrifts in the stamped image.


So...please consider joining my challenge this week...and seriously this is like my 3 holiday card so far this year...strange I know...  :o)

Happy crafting....Lynda

Entering this card into the following:
Crafty Bloggers Network - Christmas
Sparkle N Sprinkle - embossing 


Thursday, September 11, 2014

Text Me....text only stamping challenge at Red Rubber Inspirationals this week

It's my turn to host the challenge this week at the Red Rubber Inspirationals blog and I decided that a TEXT only theme would be fun.  This means no stamped images...just text on your project.

I pulled out this wonderful Joyful Notes stamp set and decided to make it the focus of my projects.


For my first project I decided to create a window card.  I first diecut the thought bubble from the front of my card base.  I then stamped the sentiment in the window on the inside of the card.  I then used the same black ink to outline the cutout shape.  I then used liquid pearls to outline the shape.  To finish it off I added this cute heart shaped resin shape.


For my next card I used the same diecut shape, but stamped directly onto the cutout shape.  I then chalked the entire shape.  I then used the same black into to ink the edges of the shape.  I then added the stamped shape to my card base using foam tape.  The card was finished using three Prima flowers with brads used as the centers.


I hope you are inspired to take my challenge and jump in with us this week.  You can link your challenge card up to my blog post on the Red Rubber Inspiratioanls blog here.

Happy crafting....Lynda

Entering card into the following:
Crafting from the heart:  Anything Goes
Whoopsi Daisy Challenge - Throw on the Flowers

Thursday, August 28, 2014

Pull out your stamps and join me please...

I'm hosting the challenge this week on the Red Rubber Inspirationals blog and my challenge theme is "Stay Focused on Stamping Anything Goes".  That means pull out your stamps and really make them the star of whatever you make...just be sure in your writeup you tell us about your stamping.

For my card I decided to use the same stamp set I used a few weeks ago for another challenge on the blog....this set is called life so big:


Totally awesome stamp set.  Three images that allow you to create endless projects.  For my project I stamped the butterfly in the square in the bottom right hand corner of my card base.
I colored the image using my Copic markers.  I then doodled the outline around the balance of the cardbase.  I also added white accents with a gel pen to make the image and frame POP.  I find that tiny touches of white really make a colored image jump off the page...what do you think???


I hope you'll pull out your stamps and create some magic...play along...have fun with me...  be sure to link up your project to the blog post here by September 3rd at midnight!


Happy crafting....Lynda

Entering this card into the following:


Thursday, August 14, 2014

Please join me...in Marking the Spot....

It's my week to host the Red Rubber Inspirationals challenge this week.  The theme I chose was Mark the Spot.  I want to see you pull out your stamps and create a bookmark.

For my project I first stamped the large butterfly from the Flutter By stamp set onto this colored cardstock.  I then created a mask of the butterfly using scrap copy paper and then fussy cut that image out.  I then used the mask to cover the butterfly image and stamped the image from the Well Defined stamp set that defines Companion three times on the cardstock.  I then trimmed the cardstock into the bookmark shape and punched the hole into the top.  I colored the butterfly with my Copics.  I then added the wonderful trim from my stash to the top.


I hope you'll take my challenge and link up a stamped bookmark to the Red Rubber Inspirationals blog today!!!  You have until Wednesday, August 20, 11:59 CST.

Happy crafting....Lynda

Entering my bookmark into the following:


Monday, June 23, 2014

Emboss It....

This week Drea has an awesome challenge on the Red Rubber Inspirationals blog...to pull out your stamps and emboss something on your project!!!  So...for my project I decided to make some bookmarks for an end of the school year gift.  My youngest took these to school with her name and phone number on the back to hand out to people she wanted to stay in touch with over the summer...and a few stayed here at home and have found their way into a favorite summer reading book already!!!

I used the Lotsa Dotsa set and stamped the dot image down the one side of my precut cardstock.  I then emobssed the image with clear powder.  I then ran the edges of the bookmark through the same colored ink and clear powder and heat set it.  This adds a nice crisp edge to the bookmark and I think really shows off the colors.  I then found some nice trims in my stash to add to each one after punching a hole in them:


So...what are you waiting for....pull out those stamps, embossing powder and heat tool and get busy creating something fun for the challenge.  You have until Wednesday, June 25 at 11:59 PM to link up your creation.

Happy crafting....Lynda

Entering this project into the following:

Thursday, May 08, 2014

Lets Celebrate Friendships....with a new challenge at the Red Rubber Inspirationals blog

This week it is my turn to host the challenge at the Red Rubber Inspirationals blog and the theme is Celebrate Friendships.  I wanted to take the time to remember those that are special to us that add so much to our daily lives....those close friendships that we have.  So for your project you can use an image that may remind you of a friend, color an image to look like a friend, or just use a friendship sentiment on your card for a friend.

Here is my project for this challenge:


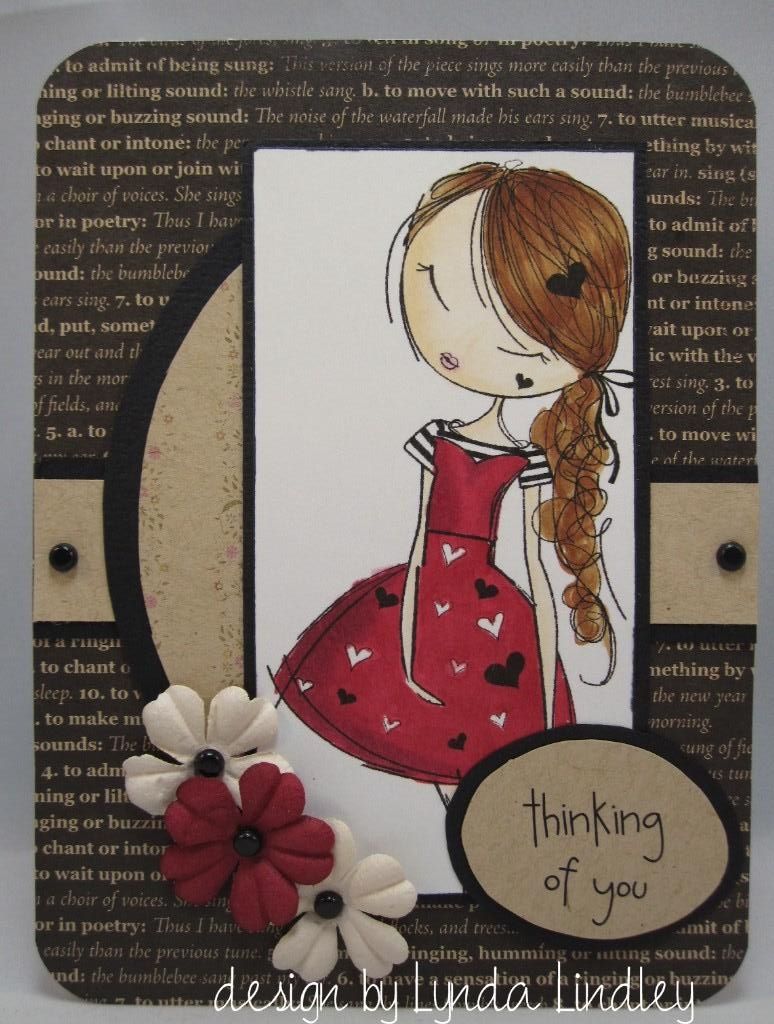
For my card I used the Joyful notes sentiment set and the Butterflies are free stamp sets.  I first stamped the main image onto white cardstock using Memento black ink.  I love this image by Phyllis Harris and it totally made me think of one of my good friends and her joy for life.  I then colored it in with my Copic markers.  I colored her to look like one of my best friends.  I then stamped the sentiment onto white cardstock and colored it with a pattern similar to the bottom of the other image.  I then used a brown marker to edge both pieces.  I then created the pattern on the card base with scraps of pattern paper from my favorite Cosmo Cricket line Early Bird.


I hope you'll take out your stamps and create something this week for my challenge...and be sure to link it up on the Red Rubber Inspirationals blog before Wednesday, May 14 at 11:59 CST.

Happy crafting....Lynda

Entering this card into the following:
Crafting from the Heart - Anything Goes 
My Craft Creations - Anything Goes


Thursday, April 24, 2014

Time for a new bit of inspiration....

This week the challenge #117 on the Red Rubber Inspirationals blog is hosted by Mary Anne.  This week you are asked to create a postage themed project.  I decided to use the Butterfly Postage set for my card.

I printed the image onto white cardstock and colored it with my Copic markers.  I then cut out the image and mounted it onto cardstock of coordinating colors.  I wanted the stamp to remain the focus of my card, so I only used these two coordinating cardstock colors in addition to the single pattern paper piece for my card.


So...what are you waiting for....find those postage themed stamps and get busy.  You have until Wednesday, April 30 to link up your project here on the Red Rubber Inspirationals blog.

Happy crafting...Lynda

Entering this into the following:


Thursday, March 13, 2014

One Last Snowfall anyone...


It's time for a new challenge on the Red Rubber Inspirationals blog.  It's my turn to host and my theme this week is One Last Snowfall.  Watching the forecast across the country I am sure there are  LOT of folks that hope this is their last snowfall of the season they are experiencing right now!!!

So...pull out those snow theme stamps and create something...

For my project I started with a piece of packaging that I had in my craft room.....those clear boxes that some crafty supplies come in.  I have a small stack of them that have been cut into pieces.  I used Stazon ink to stamp the main image from the Snowflake blocks stamp set onto the acetate.  I then took various colors of distress stain and blotted them onto the reverse side of the acetate.  I then added these sparkly brads to the center of the snowflakes.  I then stamped the sentiment from the Sophisticated Sentiments stamp set onto white cardstock and backed it with two colors of cardstock.  I then embossed the scrap of white cardstock and mounted it onto the same two cardstock colors and then onto my card base.


Be sure to check out the other snow related projects featured on the blog today...and enter your project!!!

You have until March 19 at 11:59PM to enter your project right here......so what are you waiting for...


Happy crafting...Lynda


Sunday, December 22, 2013

Red Rubber Designs for the holidays

I have been having such a great time as the Inspiration Champion for Red Rubber Designs; helping to setup the new design team and establish their new inspirationals blog that will launch in early 2014.  I have been using their stamps for a few holiday projects this year and it has been so much fun.

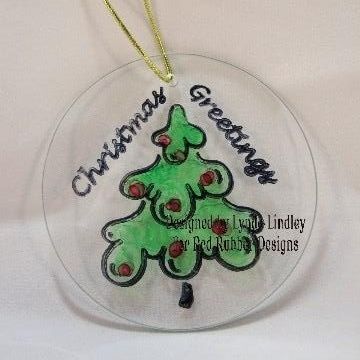
First my youngest daughter and I decided that we both LOVE this Brushed Christmas stamp set so much that we used it on our holiday card envelopes first....and then because we were kind of hooked on it after stamping those...I pulled out these wonderful glass circle ornaments that I bought after Christmas last year to see what we could make with them.

I used Stazon ink and stamped the tree and sentiment from the set onto the one side of the ornament.  I then used my Copic markers to color on the other side of the ornament.  My daughter joined in the fun as you can see from this picture:


and here is what the final ornaments look like:


and then I created these home decor letters for a family member for Christmas using the Hemingway pattern paper from Red Rubber Designs.


I hope you like my holiday projects....and be sure to check out all the wonderful products in the Red Rubber Designs Store...and the clearance section is to die for!!!

I'm entering both these projects into the Christmas Love Campaign...since these will both be gifts that we deliver to our extended family in California.

Happy crafting....Lynda

Saturday, December 21, 2013

Cuttin’ and Stampin’ DT call 2014

It's time again for the Cuttin' and Stampin' team to recruit some new talent.  I would love to stay on, so I am tossing my hat in the ring to continue on this amazing team.  I would be happy to be part of either the mixed media or the challenge team.  So be sure to check out all the details of their call on their blog post here.

Here are a few of my favorite projects from this past year.  I have to say that this was a totally fun post to create because looking back over all my projects from the year is totally fun!

So...here is a collection of my work from this year, cards, layouts, home decor, mixed media pieces......some you may have seen here on my blog...a few you may not as they were magazine pieces...

I hope you enjoy my work:


Holiday ornament created using Brushed Christmas stamp set from Red Rubber Designs


Home decor project featuring pattern papers from Red Rubber Designs


card created using an image from Wendy Burns - All Dressed Up


card created for Cuttin' and Stampin' featuring the Bazzill basics countdown to Christmas papers


card created for Cuttin' and Stampin' using the Swanky Snowdudes set from Paper Smooches


care created for Chi Chi Memories using their Winter Fun set


created using Dilly Beans image


created using a Dilly Beans image


created using a DigiStamps4Joy image


created using a Tiddly Inks Image


canvas created using digital image from Chi Chi Memories Beach Time set


Balsa wood apple tray created using digital papers from Lillian Ellaboudy designs


created using digital image from by Lori Designs


created using digital freebie from Chi Chi Memories


layout for my sketch for Scrap N Art magazine


created using digital image from 2 Cute Ink


created based on my sketch using image from All Dressed Up


layout created using My Minds Eye products.

I hope you enjoyed my trip down memory lane as much as I did....I am excited for what 2014 brings...

Happy crafting....Lynda